
I love wearing vintage; of course I do. Today’s high street clothing generally leaves me cold, and I love the hunt for something different.
But sometimes I feel bad about wearing really old clothes. What if I damage them? The crushing guilt of having irrevocably damaged something Old is not an experience I want to have… cough, again. [insert emoji of shame]
Long story short, I try to restrict my wearing of vintage to
- Garments that are in sturdy, as-new condition (and since the vintage menswear I love is generally better made than modern clothes, they can be seriously sturdy); and
- Ridiculously common basic garments that museums already have more than enough of (meaning that even if I accidentally trash this one completely, there are a trillion more out there and I have destroyed only an infinitesimally small piece of history.)
A case in point: vintage dress shirts. Common, well documented, well made. I have two that I particularly love, and I’ve been wearing them for years, and they’re in great condition. Except…
Nooooooooooooo!
Oops. [insert emoji of crushing pain and embarrassment]
This shirt is beautifully soft and fine, and I adore it. I’ve been wearing it for twenty years. It’s probably not surprising that it eventually gave in and tore, and for a while I hung it up and considered what to do.
Really, there’s only one thing TO do. Do what they obviously did… hire a nest of mice to perform a minutely perfect mend.
Failing that, refer to a Victorian dressmaking book like Agnes Walker’s 1898 “Needlework and Cutting Out” (my Bible these days, and easy to find on Abebooks) and perform said surgery myself. Follow the photo story below to get the method.
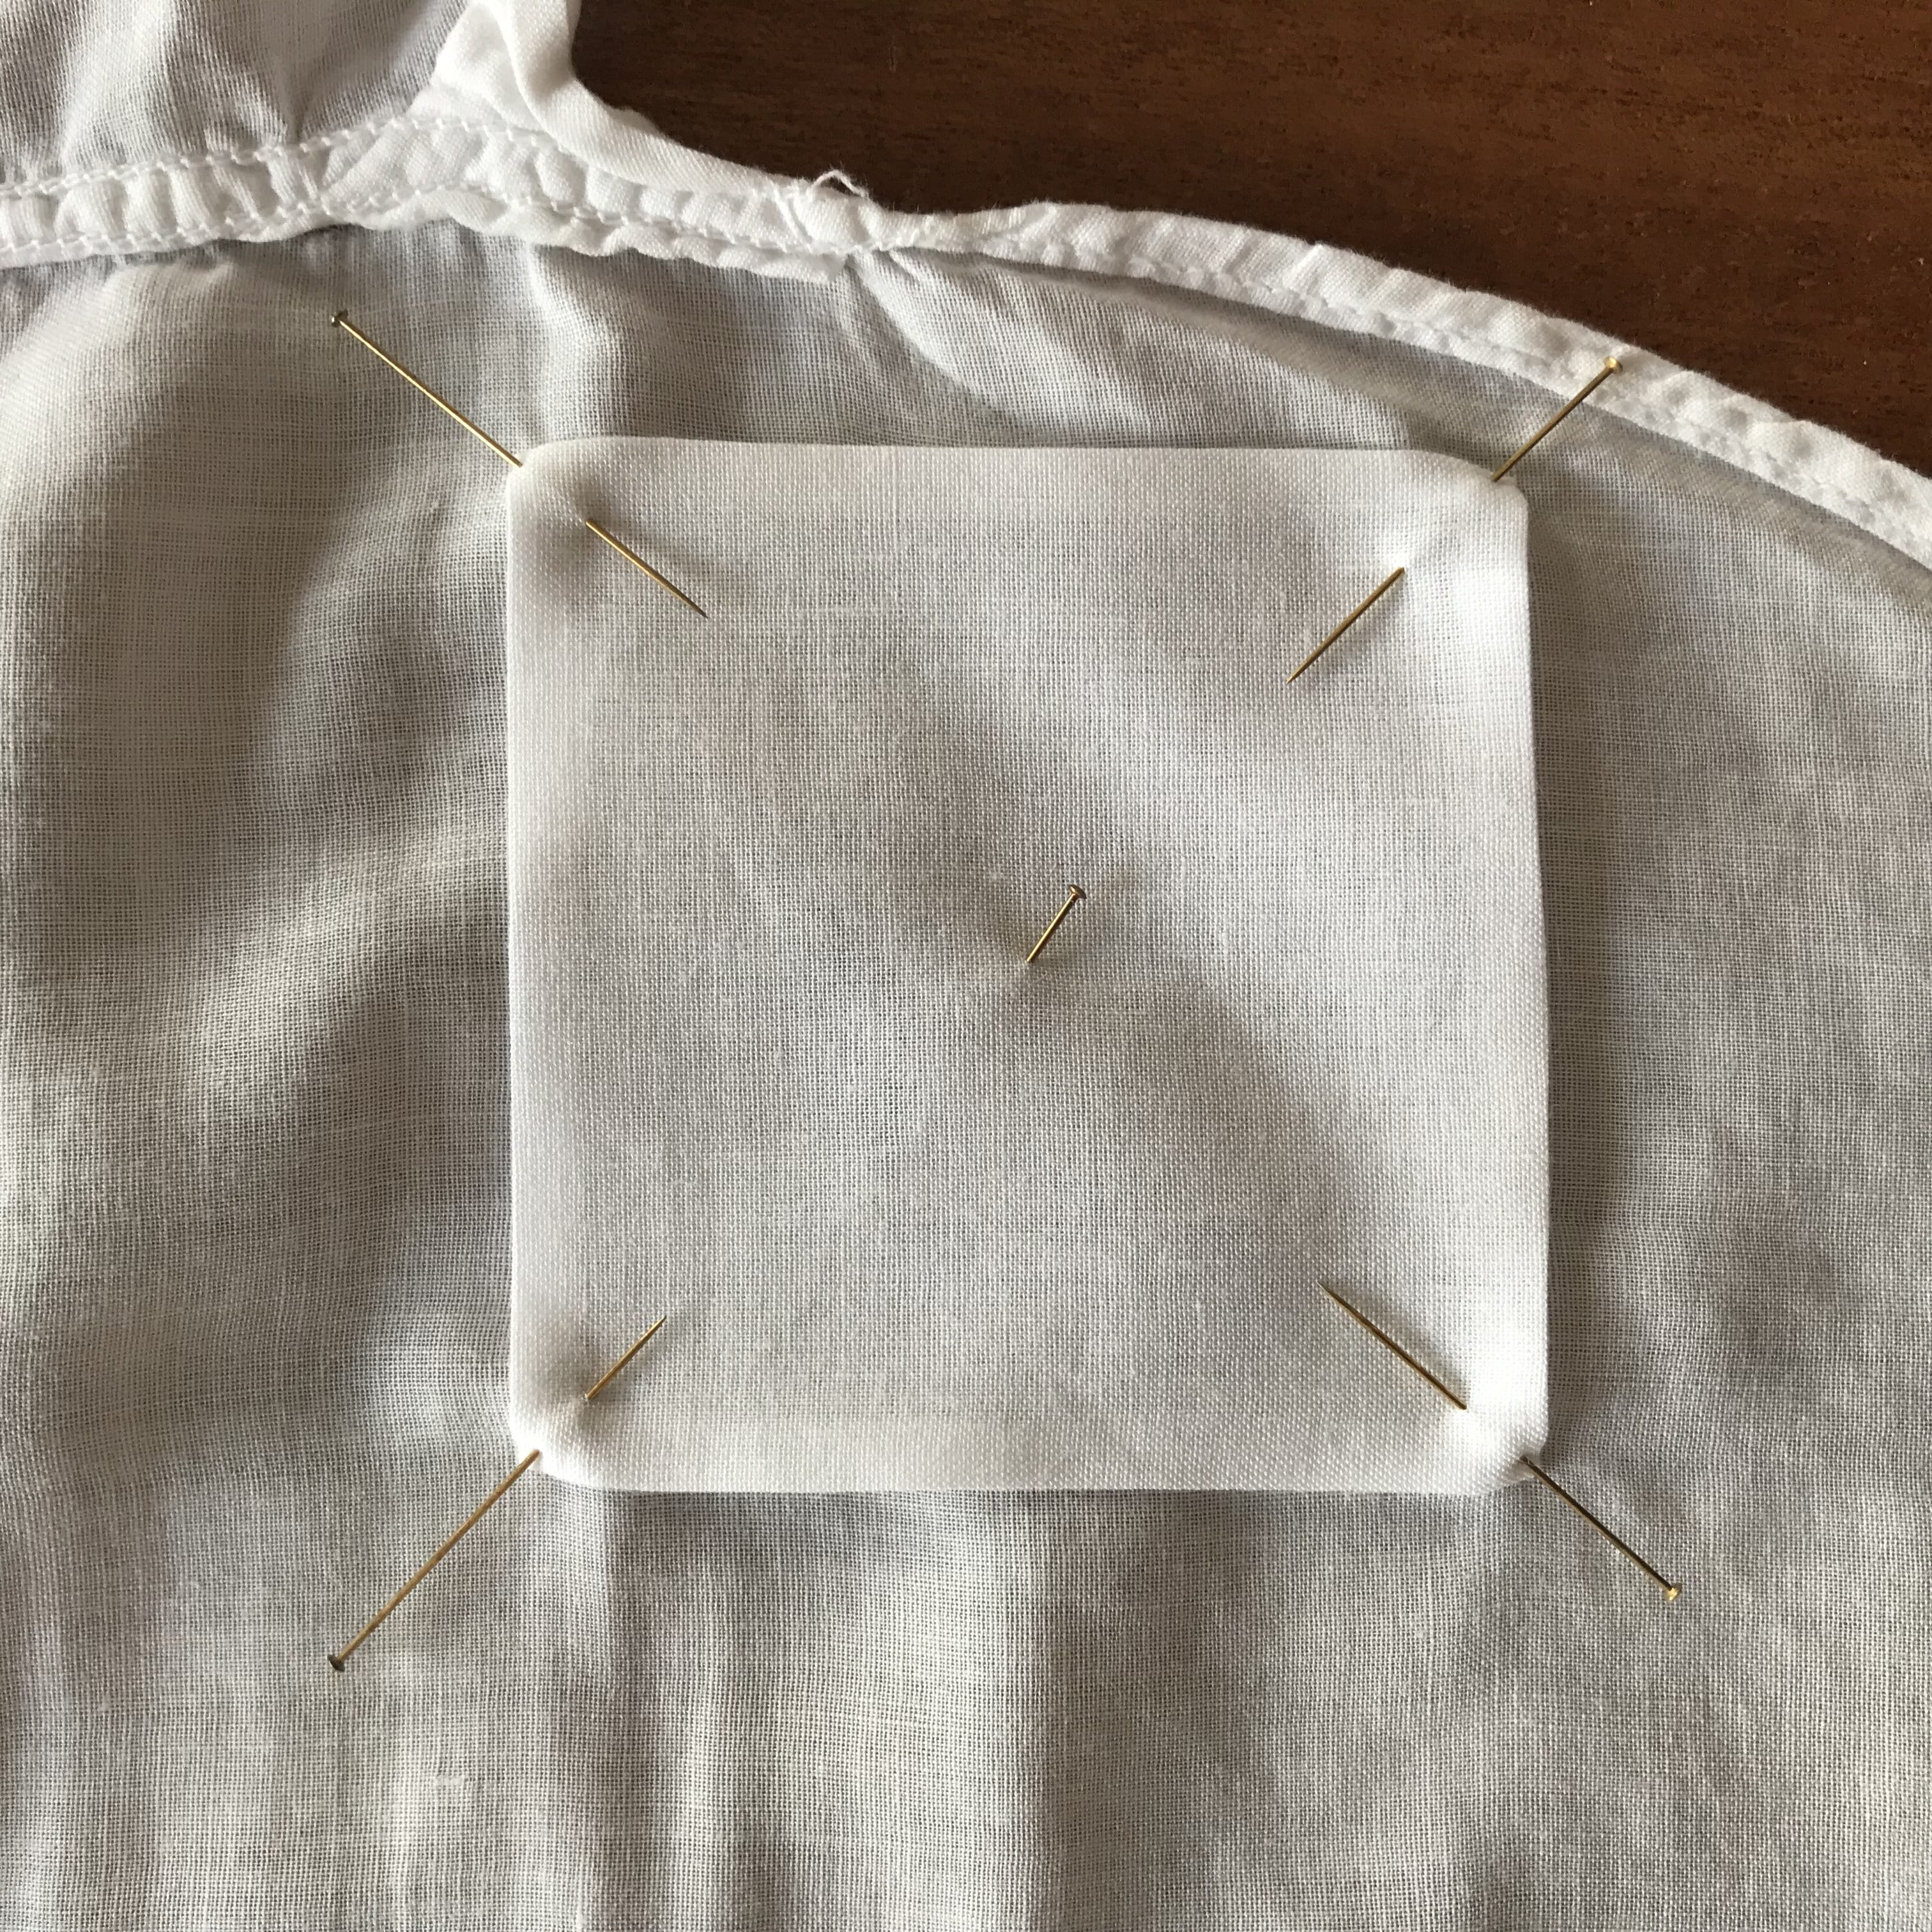
Step 1: Pin a patch made of similar cotton lawn to the garment, on the wrong side.
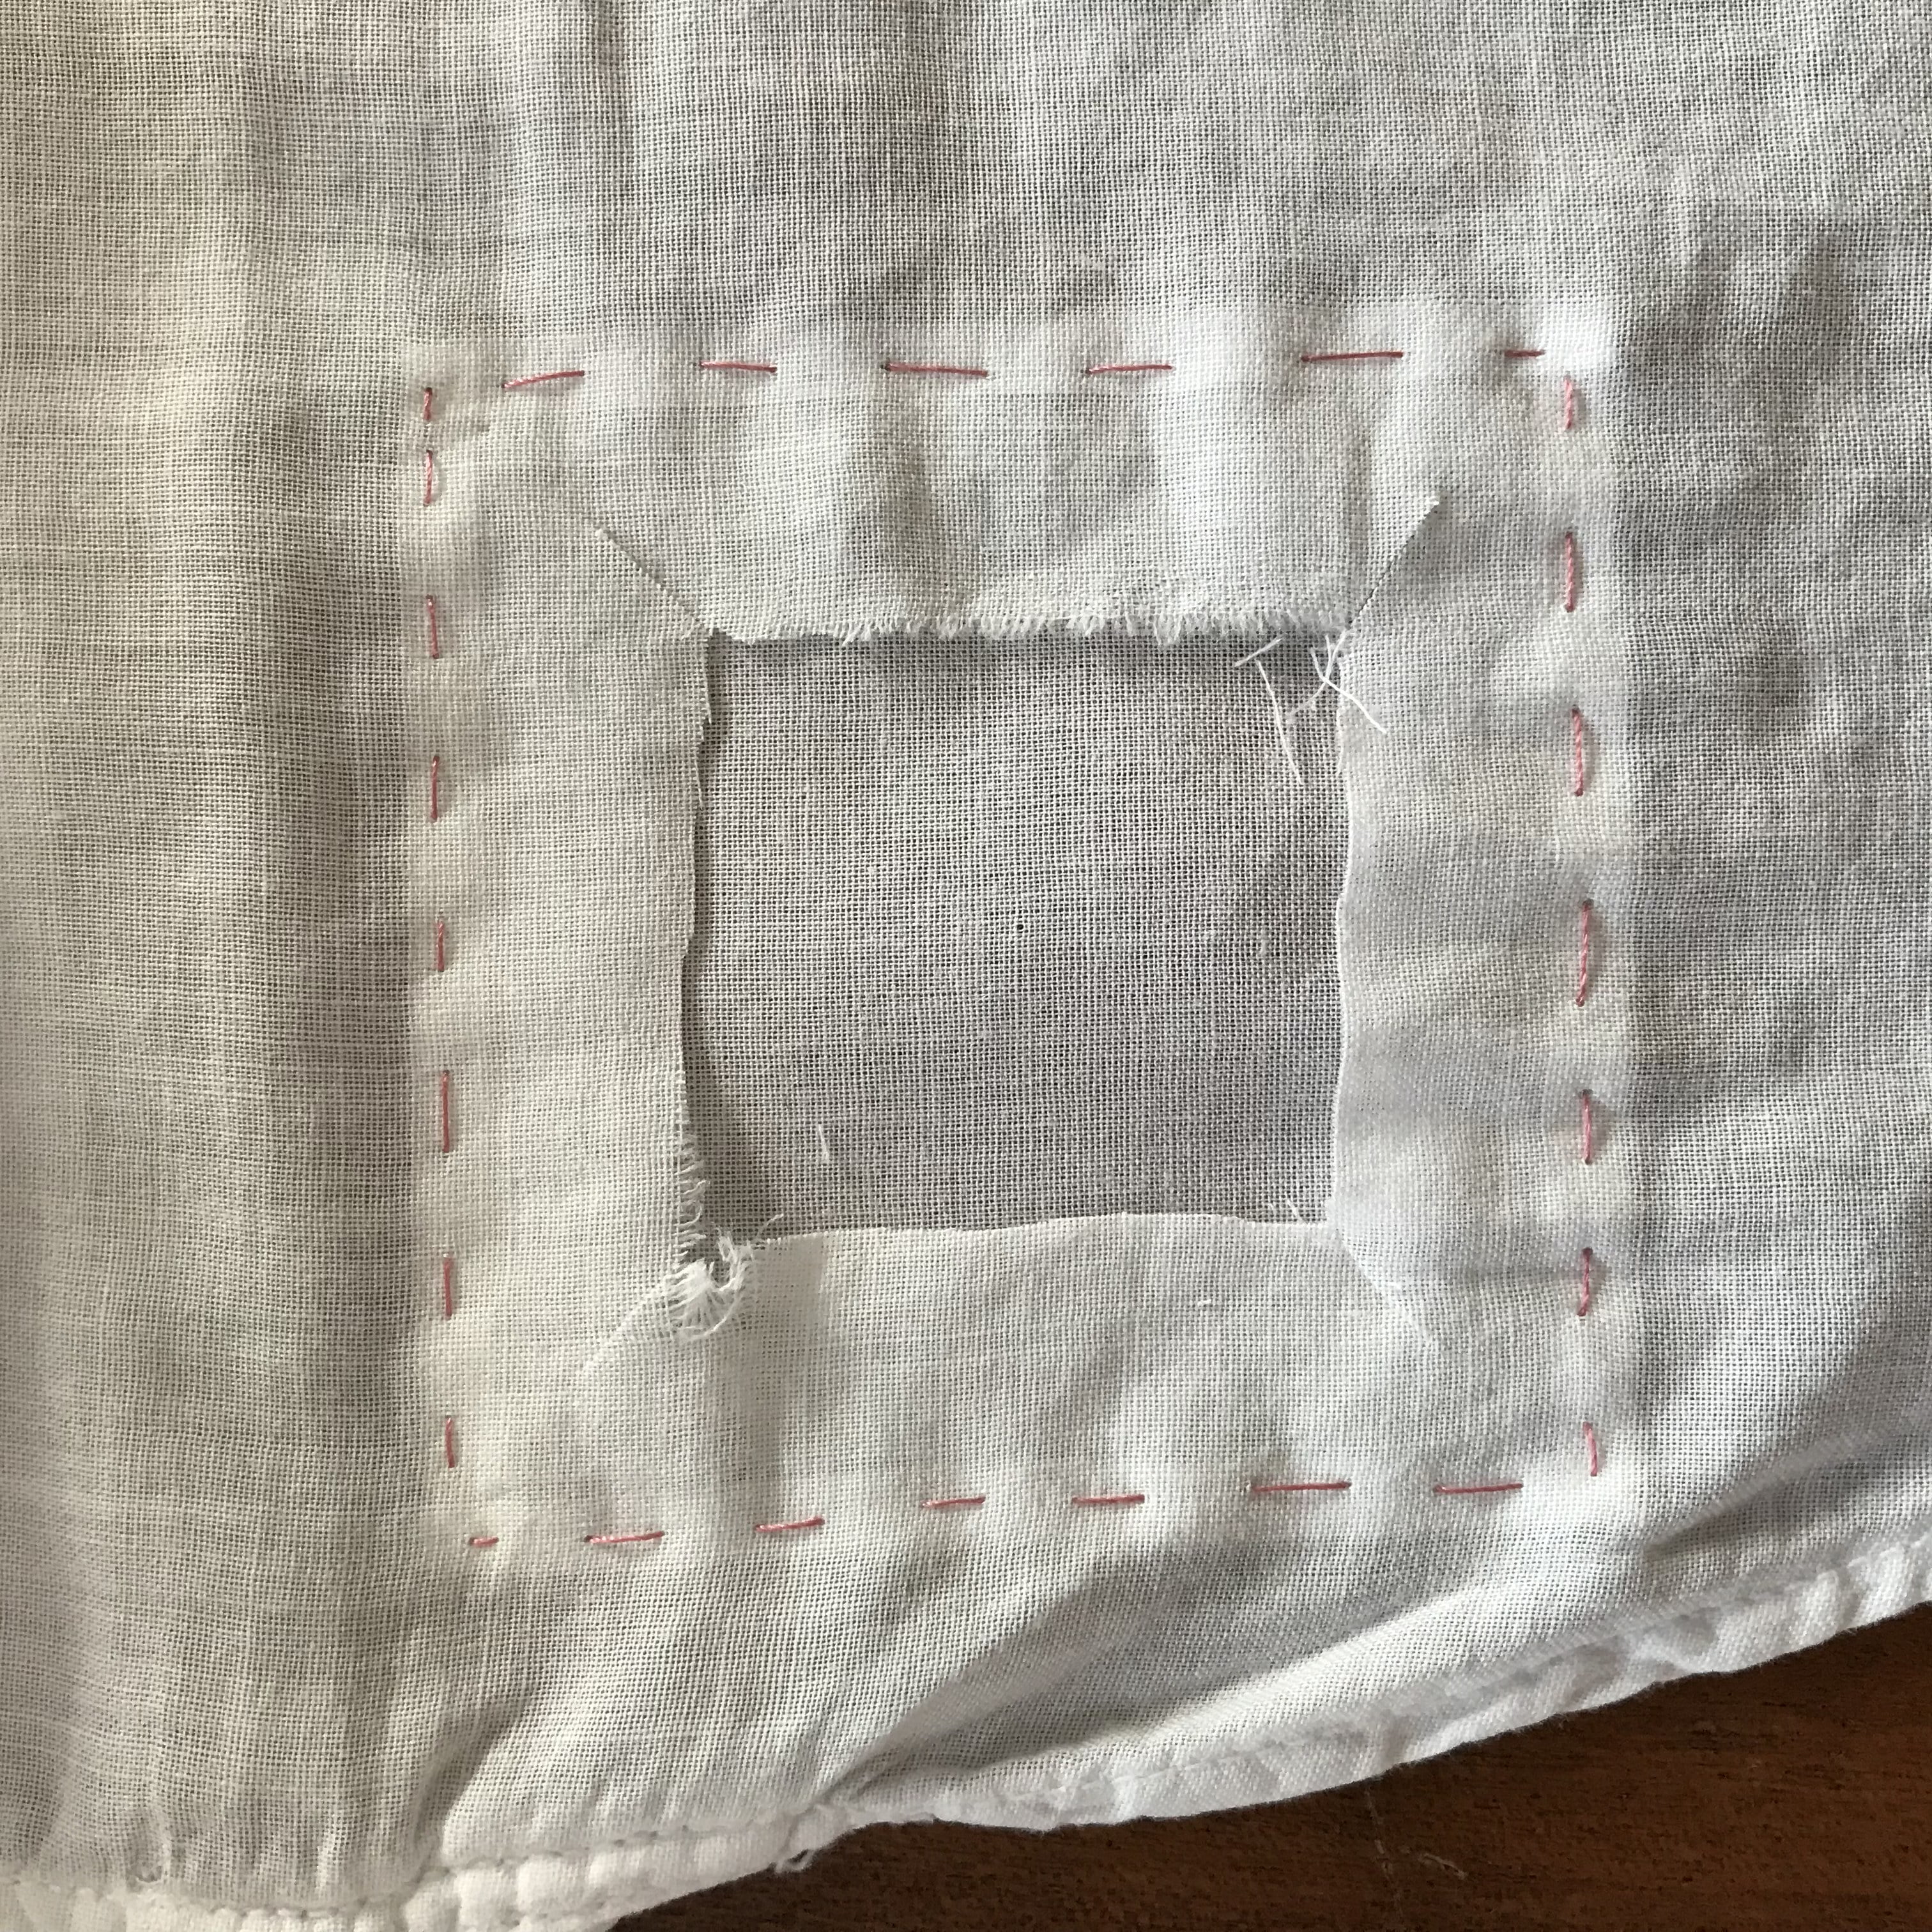
Step 2: Baste the patch in place and turn to the right side. Say three Hail Marys as you face your crime, framed neatly in contrasting running stitch.
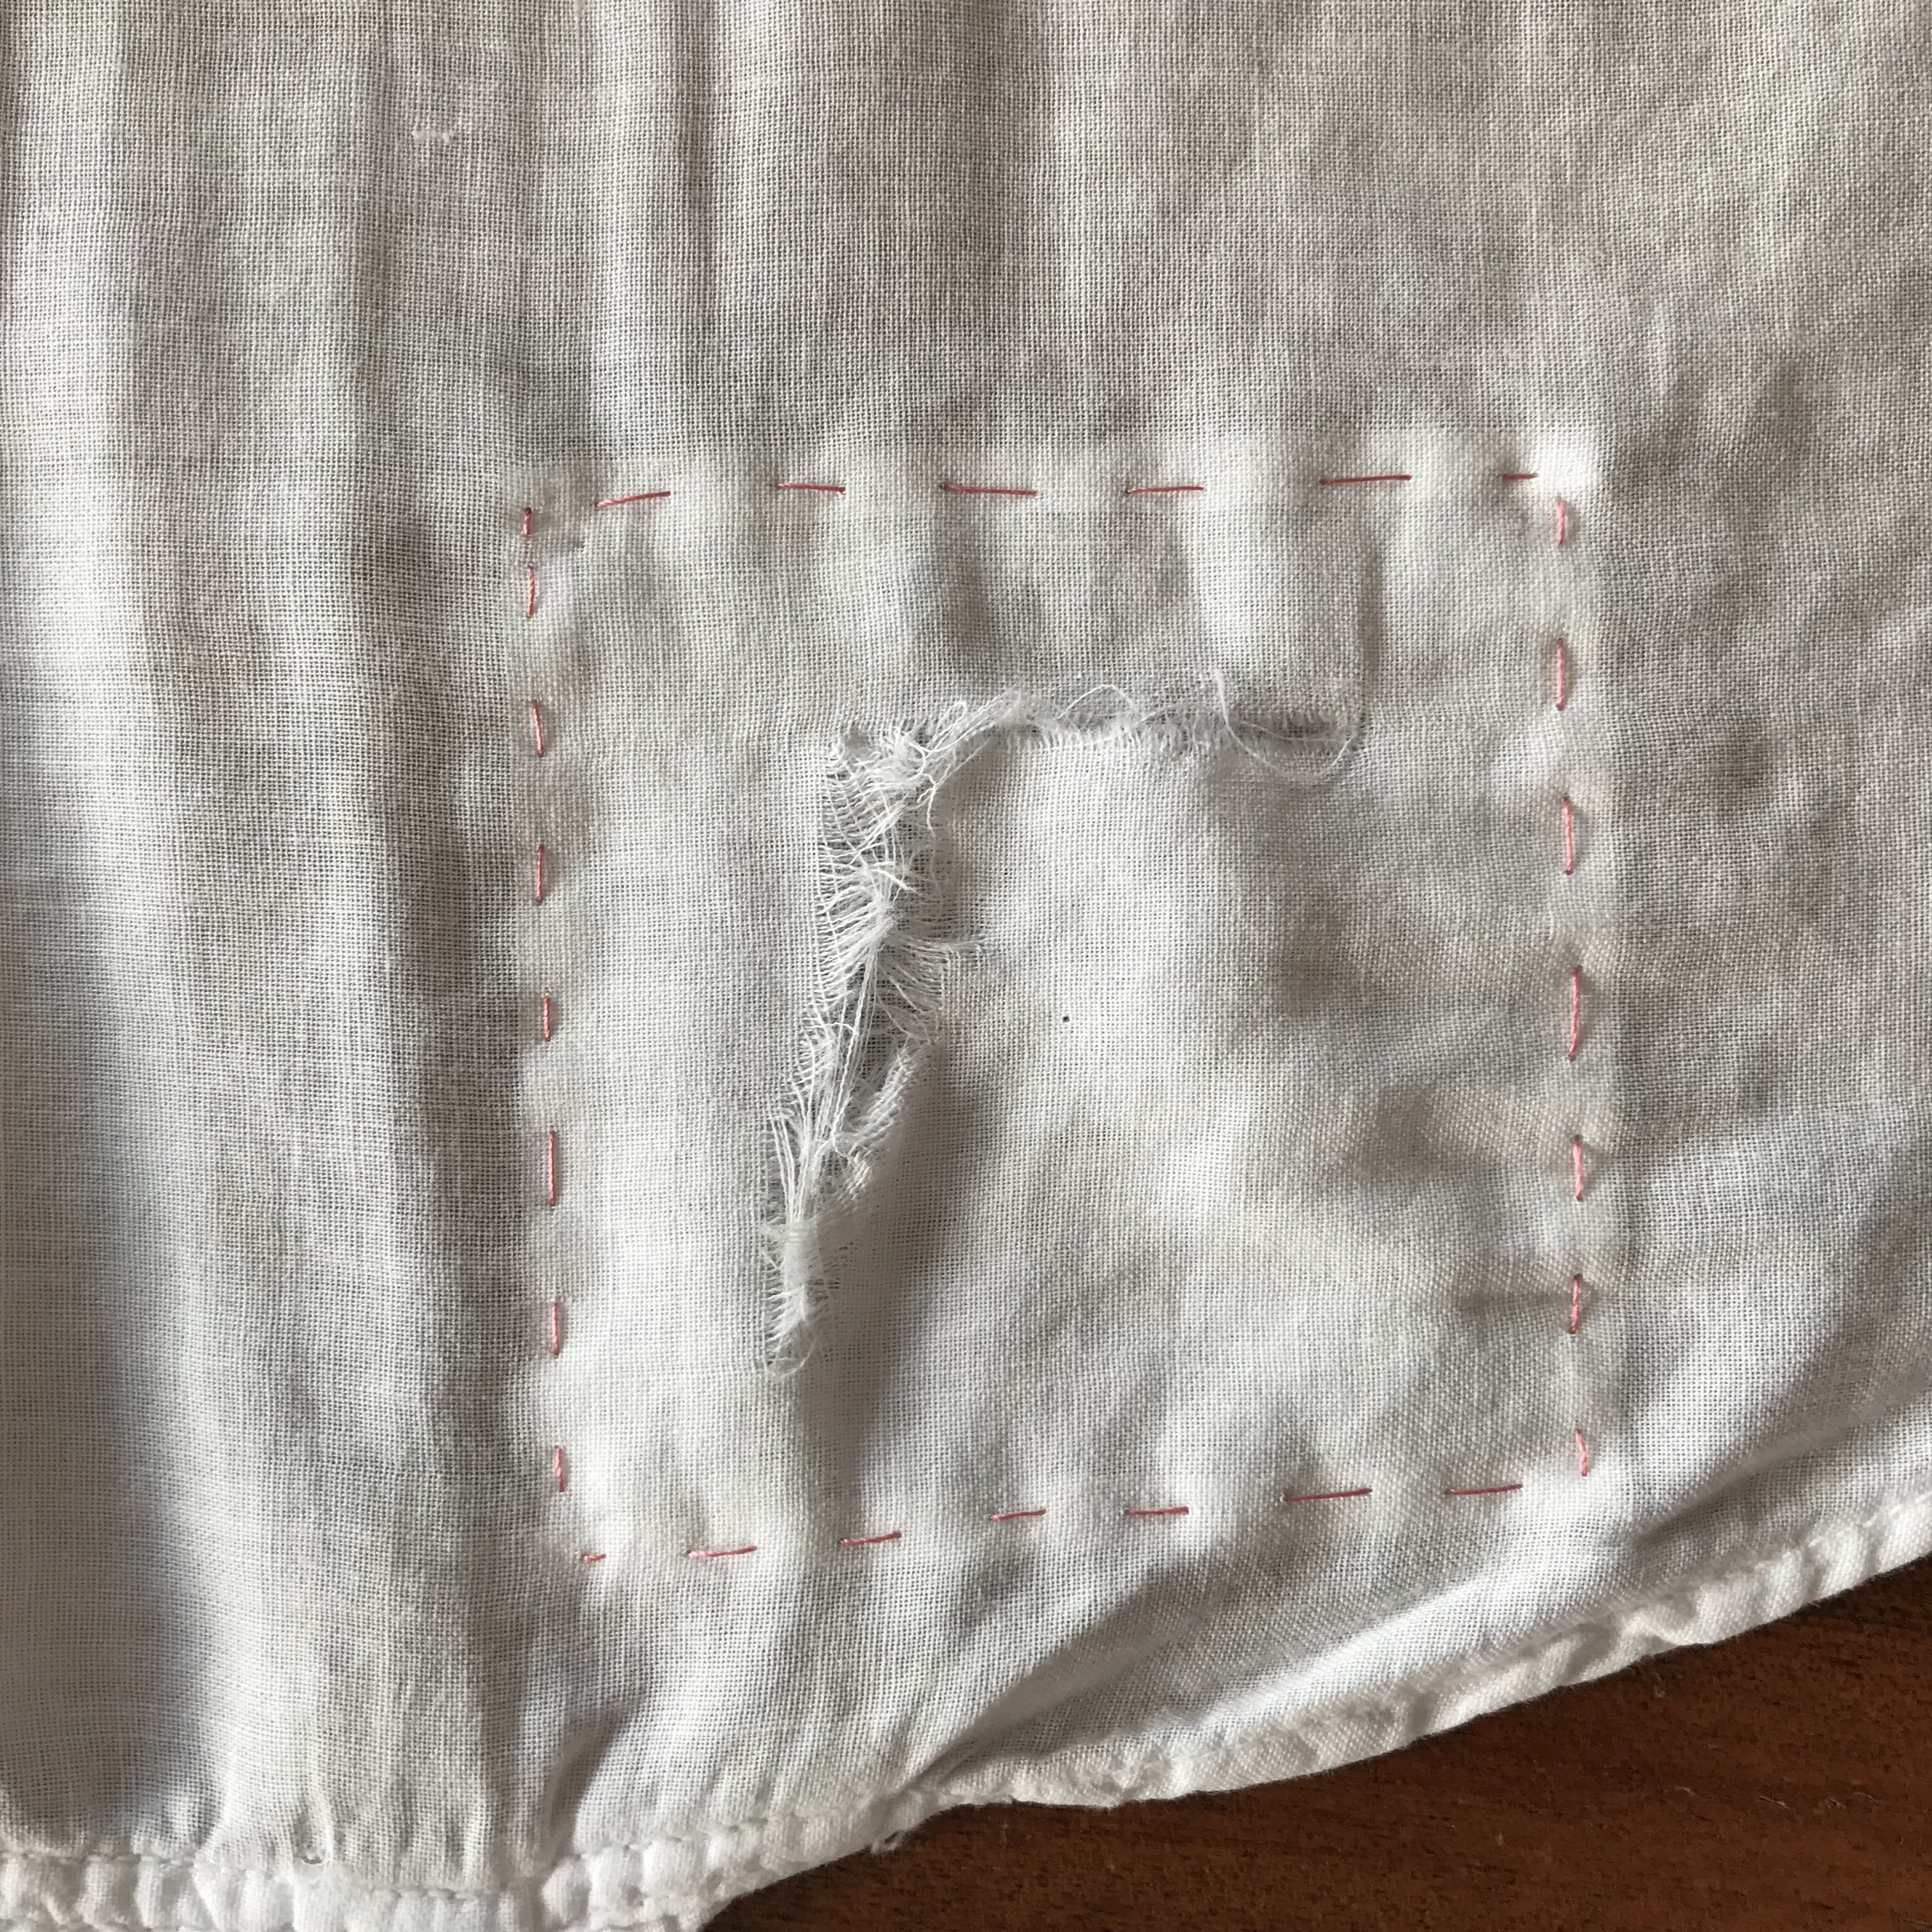
Step 3: It has to get worse before it gets better: take your heart in your mouth and snip away the offending rip, deliberately leaving a gaping hole in gorgeous, irreplaceable vintage fabric, whilst crying.

Step 4: Snip a quarter of an inch into each corner and turn the edges of the gaping hole under. Baste.
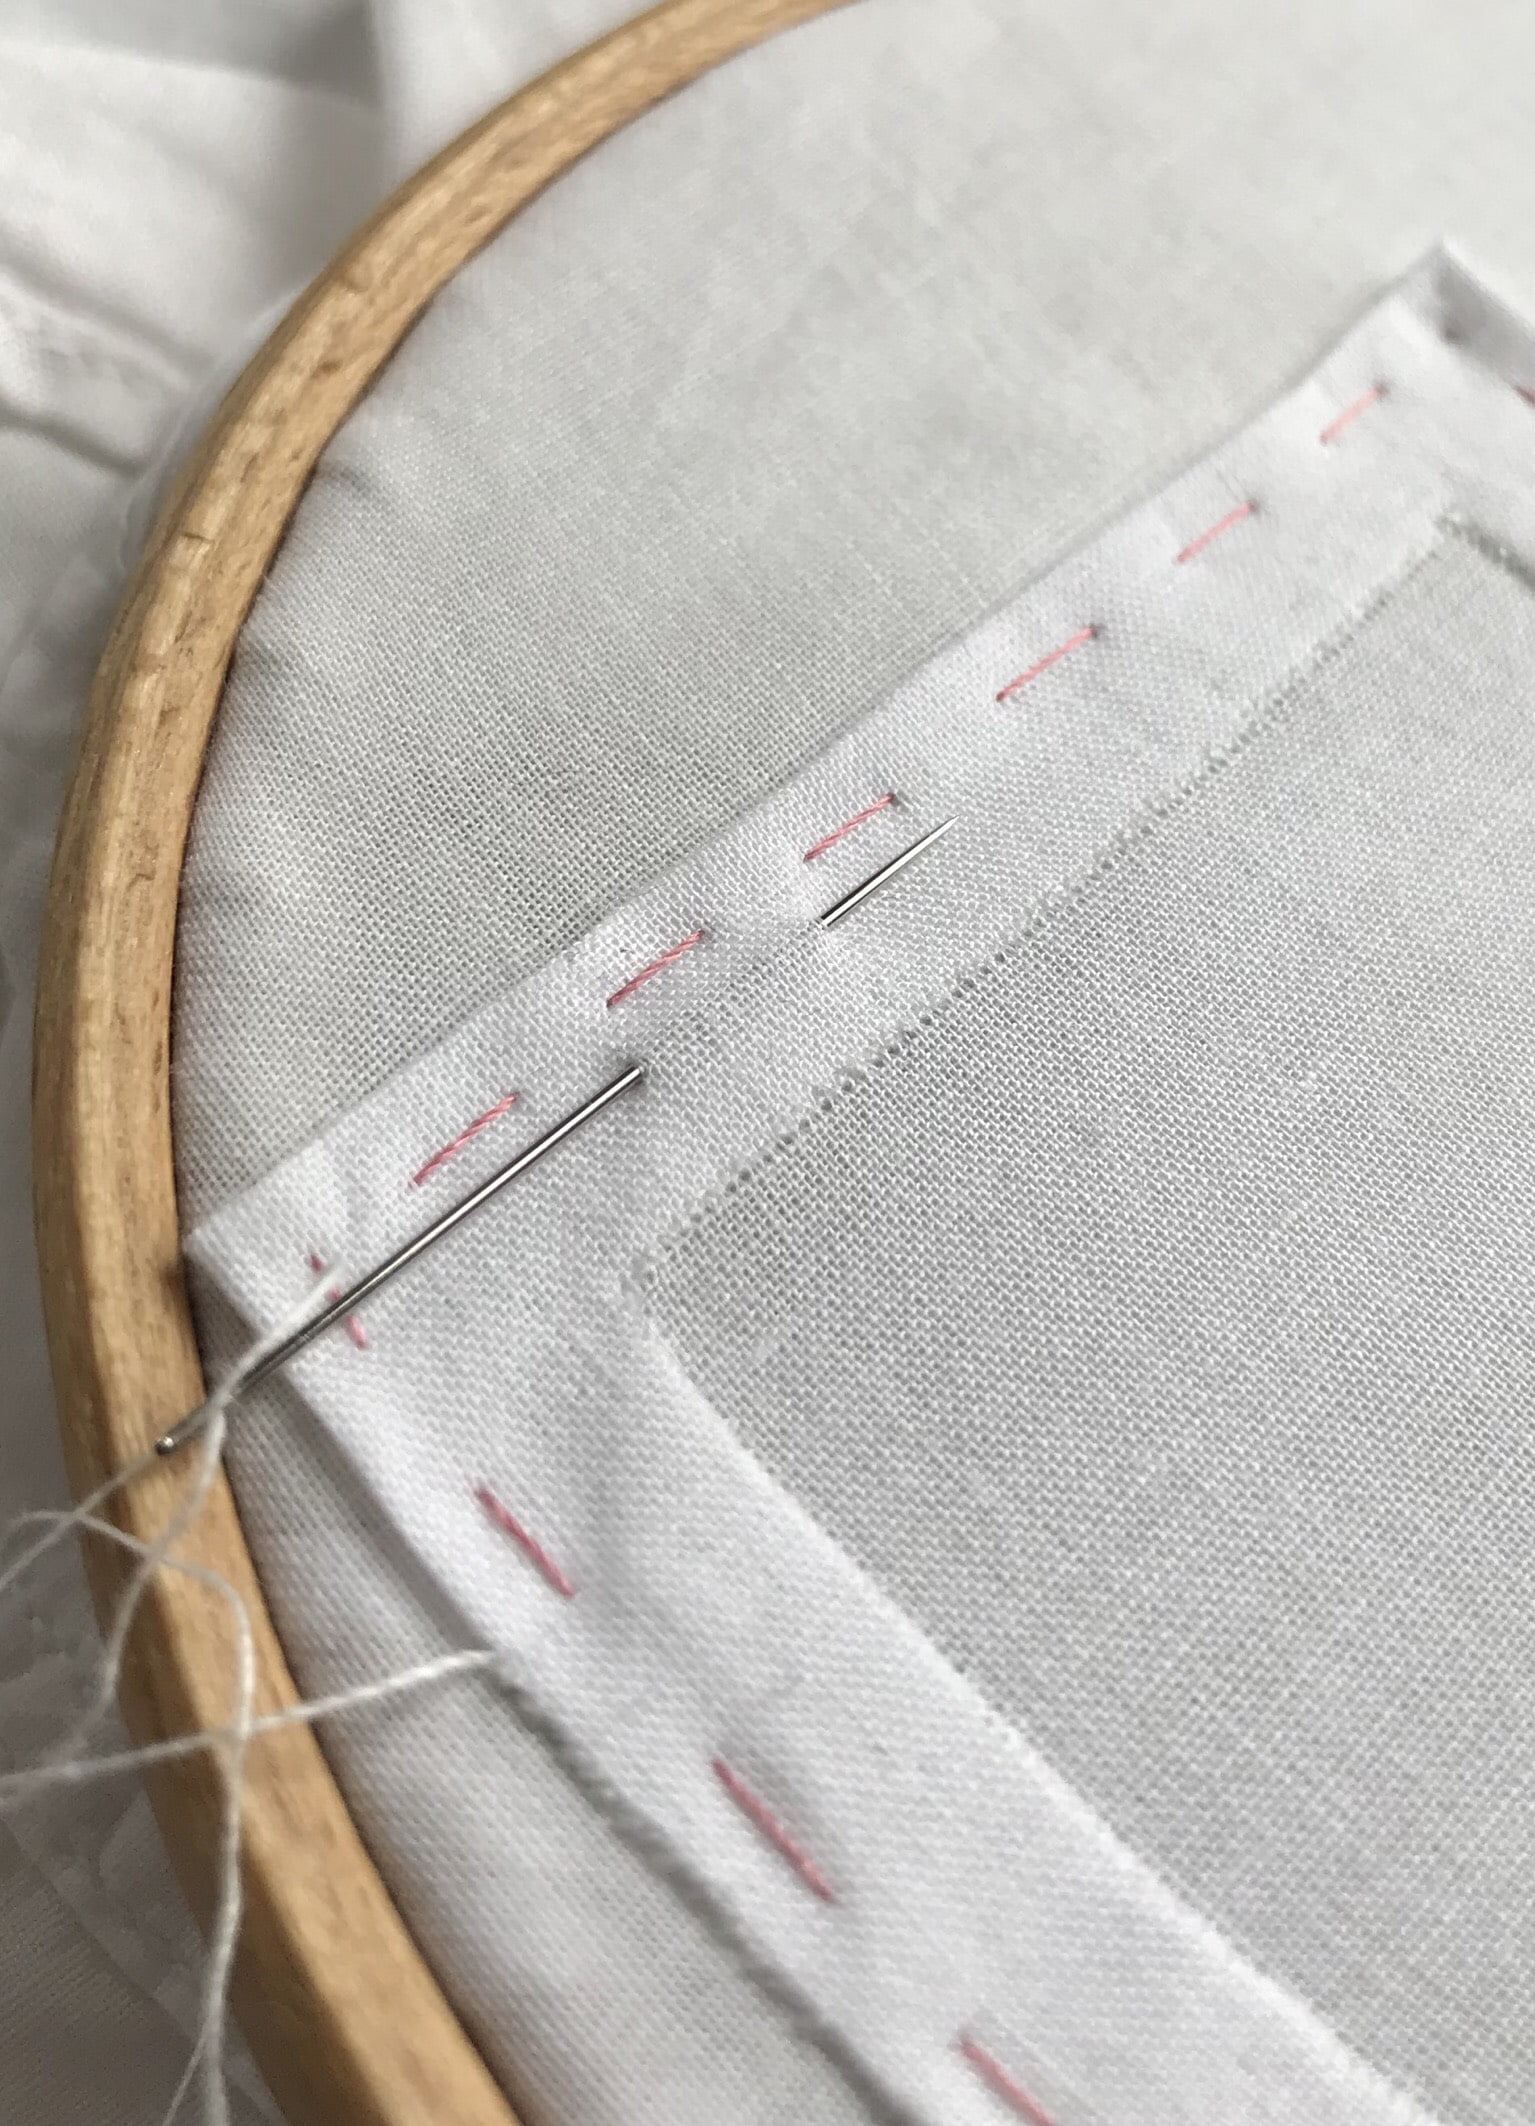
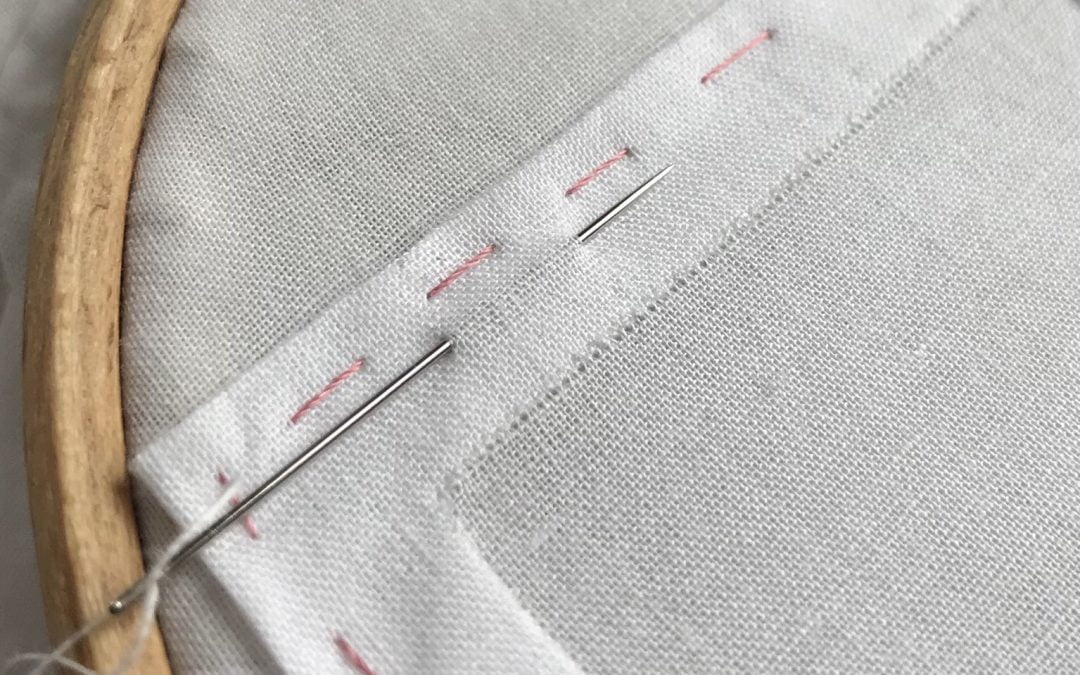
Step 5: Agnes Walker says the stitches sewing the patch down should be two threads apart, each taking up two threads on the needle. I recommend using an embroidery hoop. When you’ve made it all the way around the hole on the right side, then you can do the same around the edge of the patch on the wrong side. This is penance for your vintage crime: suck it up, buttercup, and finally enjoy your beautifully, authentically mended vintage piece. You are now absolved and may go on with your life. You’re welcome.
As you can see, I’m not quite done paying for my crime yet, but I will have this finished very soon. Where did those mice go, anyway?
Beautifully done. You deserve absolution.
Brilliant! Although my poor eyes will need a magnifier to accomplish the precision, I am definitely going to use this technique!
A lovely mending job! I will try this technique the next time I need to patch something. Thanks!
WOWSERS!!!!
(and it’s also available through the US book archive for free as a pdf and in several other formats.
https://archive.org/details/krl00366374/page/n11 )
This is wonderful. I will have to purchase the book. I have many vintage clothes I’ve been reluctant to mend, and it may help.
Thank you so much.
Brilliant, painstaking repair
Thank you for your, frank and funny account of your dilemma. Mending mice are so hard to come by nowadays!!
Those painstaking old instructions now make sense to me, thanks to your step by step photos and hilarious modern comments. I suspect the role of embroidery (pre-sewing machine) was to train women’s fingers to stitch this precisely. Sewing shirts and cravats for their menfolk was a family affair; Jane Austen mentions family sewing sprees in her letters, prior to sending brothers and cousins to Oxford or the navy.